
How to Grow Microgreens Myself
In today’s fast-paced world, where health and convenience are essential, growing microgreens yourself is a rewarding and practical solution. These tiny, nutrient-packed plants are the perfect addition to any meal, offering both taste and health benefits. Whether you’re a seasoned gardener or a beginner, growing microgreens in your own home is easy, cost-effective, and incredibly satisfying.
In this guide, you’ll learn how to grow microgreens yourself, right from choosing the seeds to harvesting your very own crop. Let’s dive into the world of microgreens and discover how you can grow these powerhouses of nutrition at home.
What Are Microgreens?
Before we begin, let’s quickly understand what microgreens are. Microgreens are young, edible plants harvested at an early stage of growth, usually when they are just a few inches tall. These plants are packed with flavor, vitamins, and minerals, making them perfect for adding a burst of freshness to salads, sandwiches, and more.
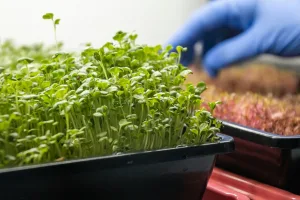
Common microgreens include arugula, basil, cilantro, radish, sunflower, and pea shoots. The best part? They are easy to grow indoors or outdoors, making them ideal for urban dwellers or those with limited space.
Why Should You Grow Microgreens Yourself?
- Nutrient-Rich: Microgreens are known to contain up to 40 times more nutrients than their mature counterparts.
- Quick Growth: These plants grow quickly, typically in 7-21 days, meaning you’ll have fresh greens in no time.
- Cost-Effective: Growing microgreens yourself is much cheaper than buying them from the store.
- Space-Saving: You don’t need a garden to grow microgreens. They can thrive in small spaces, like windowsills or countertops.
- No Chemicals: Growing your own microgreens means you control the process, ensuring they are free from harmful pesticides or chemicals.
How to Grow Microgreens Myself: A Step-by-Step Guide
Now that we understand why microgreens are so beneficial, let’s get into the steps on how to grow microgreens yourself.
1. Choose the Right Microgreen Seeds
The first step to growing microgreens yourself is selecting the right seeds. Choose seeds that are specifically labeled for microgreens, as they are grown for harvesting at an early stage. Some popular microgreens to start with include:
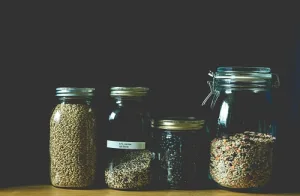
- Radish: Spicy, crunchy, and easy to grow.
- Basil: Aromatic and versatile, perfect for adding to dishes.
- Sunflower: Nutty flavor and a great source of protein.
- Cilantro: Fresh and fragrant, perfect for culinary use.
- Pea Shoots: Sweet and tender, great in salads.
Make sure to buy organic seeds whenever possible to avoid any chemicals that may be present in conventional seeds.
2. Prepare the Growing Medium
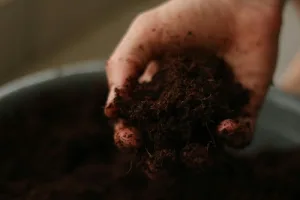
To grow microgreens yourself, you’ll need a suitable growing medium. There are two main options:
- Soil: Use a high-quality, lightweight potting mix or organic soil for the best results.
- Hydroponic Medium: For a soil-free option, you can use materials like coconut coir, peat moss, or a hydroponic mat.
If you’re growing indoors, a shallow tray with drainage holes works best. Fill the tray with the growing medium of your choice, but don’t overfill it. Microgreens don’t need deep soil, just a shallow layer of about 1-2 inches.
3. Sow the Seeds
Once your growing medium is prepared, it’s time to sow the seeds. Scatter the seeds evenly across the surface of the soil or medium. For small seeds like basil or cilantro, a light dusting will work. For larger seeds like sunflowers or peas, press them slightly into the soil.
When sowing, keep in mind that microgreens grow best when the seeds are densely packed, so don’t be afraid to plant them closer together. The more seeds you plant, the more greens you will get!
4. Water and Cover the Seeds
Water the seeds gently after sowing. It’s important to keep the soil moist but not soggy. Use a fine mist spray or a watering can with a gentle spout to avoid disturbing the seeds.
Next, cover the seeds with a clear plastic lid or a plastic wrap. This will create a greenhouse-like environment that promotes germination. Make sure to remove the cover once the seeds begin to sprout to prevent mold.
5. Provide Adequate Light
For your microgreens to thrive, they need plenty of light. If you’re growing indoors, place the tray on a windowsill where it can get at least 4-6 hours of sunlight per day. If natural light is insufficient, you can also use grow lights.
LED grow lights work well and can be placed about 6 inches above the tray. Microgreens need light to grow strong and healthy, so don’t skimp on this step.
6. Maintain Temperature and Humidity
Microgreens grow best in temperatures between 60-75°F (15-24°C). Ensure your growing area is in a warm, well-ventilated spot. If the air is too dry, the seeds may not germinate or grow properly. To increase humidity, consider using a humidity dome or misting the plants regularly with water.
7. Harvesting Your Microgreens
Microgreens typically take 7-21 days to grow, depending on the variety. You’ll know they’re ready to harvest when the leaves have fully opened and the plants are about 1-3 inches tall. Simply cut the microgreens at soil level with a pair of clean scissors or a sharp knife.
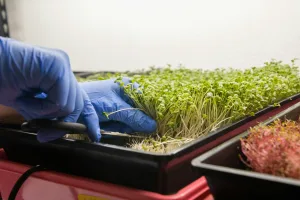
Microgreens can be harvested once and then discarded, or they can be regrown in the same medium with a second round of sowing.
Tips for Growing Microgreens Myself
- Watering: Be careful not to overwater. Microgreens don’t like soggy soil.
- Rotation: To have a continuous supply of microgreens, sow new seeds every week.
- Cleaning: Always clean your growing trays and tools to prevent disease and mold.
- Storage: Store your harvested microgreens in a container in the fridge, and they should stay fresh for up to a week.
Conclusion: Growing Microgreens Yourself Made Easy
Growing microgreens yourself is not only a fun and rewarding experience, but it also allows you to enjoy fresh, nutritious greens right from your home. By following the simple steps outlined above, you’ll be able to cultivate your own microgreens and add a burst of flavor and health benefits to your meals.
If you’re looking to take control of your food, save money, and live a more sustainable lifestyle, learning how to grow microgreens yourself is a fantastic step forward. With minimal space, time, and effort, you can enjoy the beauty and benefits of microgreen of these tiny, nutrient-dense plants.
Start today, and in just a few weeks, you’ll be harvesting your own homegrown microgreens—an easy, healthy addition to your kitchen and your life!
